Arduino mini game console
Motivation
Our goal was to create smallest posible game console for gamers who want to play their favorite retro games whenever they want. In this project we created PCB design and scheme and and 3d model for Arduino micro based game console. At creating we aimed for small dimensions and good usability.
Design
Users
We aimed for users of all ages who want to play their favorite retro games.
Functional requirements
- ability to run retro games.
- rechargeability.
Non-unctional requirements
- Small dimension.
- Long battery life.
PCB scheme
PCB design
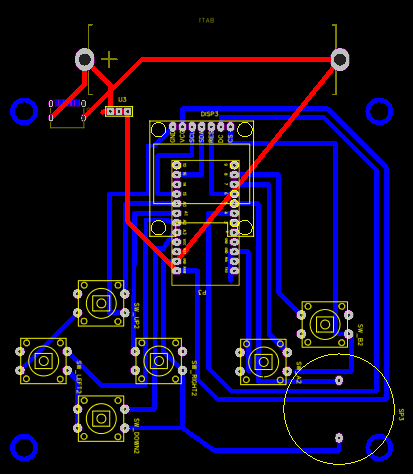
Description
The red lines show the wires connected to the printed circuit board (dps).
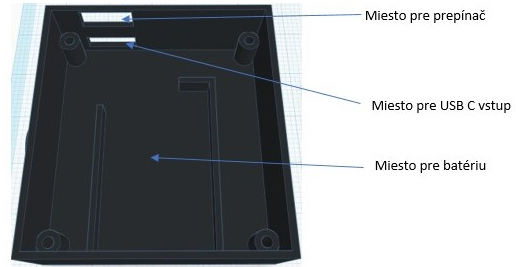
The battery is not part of the board and is connected by wires to the board.
The loudspeaker in the lower right corner is actually smaller than designed and therefore does not overlap with the button or the anchor hole.
The display is actually larger than designed and is located at the level of the board and is connected to it by wires.
The dimensions of the board are 38x43x2 mm.
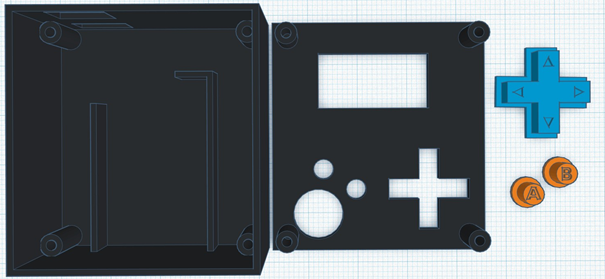
Box design
Disassembled
Assembled

Components
Needed components
• 6 pcs button on the board
• 1 three-position switch
• 1 speaker for a flat board with a cross-section of 10 mm
• 1pc 0.96 “7 PIN SPI display
• 1pc USB C female
• 1pc battery 3-5V with dimensions up to 32x21x5mm
• 1pc Pro Micro Microcontroller
• 4pcs Screw with dimensions 2x15
Cost of components
Manual
1. Printing printable parts according to the enclosed models.
2. Production or ordering of the board according to the attached design.
3. Soldering the components in their place on the PCB according to the design.
4. Glue the battery, switch and USB C input in place in the box
5. Insert the buttons at the top of the box
6. Insert the board into the box
7. Close the box
8. Screw on the box
Game instalation
Insert games into the console
• Open Arduino IDE> File> Preferences
• Enter the URL in the Additional Boards Manager URL and press OK.
o URL: https://github.com/MrBlinky/Arduboy-homemade-package
• Go to Tools> Boards> Boards Manager.
• Write homemade or Arduboy homemade in the text box.
• Select Arduboy Homemade package and press Install.
After installing the libraries go to the Tools menu and select the following:
• Board: Homemade Arduboy
• Bootloader: Cathy3K
• Based on: SparkFun Pro Micro 5V - Alternate Wiring
• Core: Arduboy optimized core
• Display: SSD1306
Games can be downloaded from: https://community.arduboy.com/c/games/35.
Open the .ino file and press upload.
Game examples
Dungeon crawler
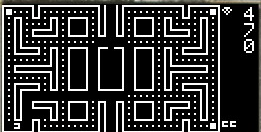
packman like
 2023/2024