This smart baby camera solution concept can inspire and demonstrate the simplicity of creating your own device to meet user requirements.
Team Members: Jakub Mikolaj, Róbert Oros.
Motivation
We came up with this idea because little babies were born in our families (and we believe that they will be born in the future) and we also think that this project would be suitable for our grandparents, when their monitoring is necessary in some health cases.
We also wanted to create something useful, what can be used daily in the care of a baby, animal, or something that should be monitored. Gain experience with 3D modeling, 3D tools and technologies like Arduino or Rasberry PI.
Existing solutions
Large amount of equipment and manufacturers
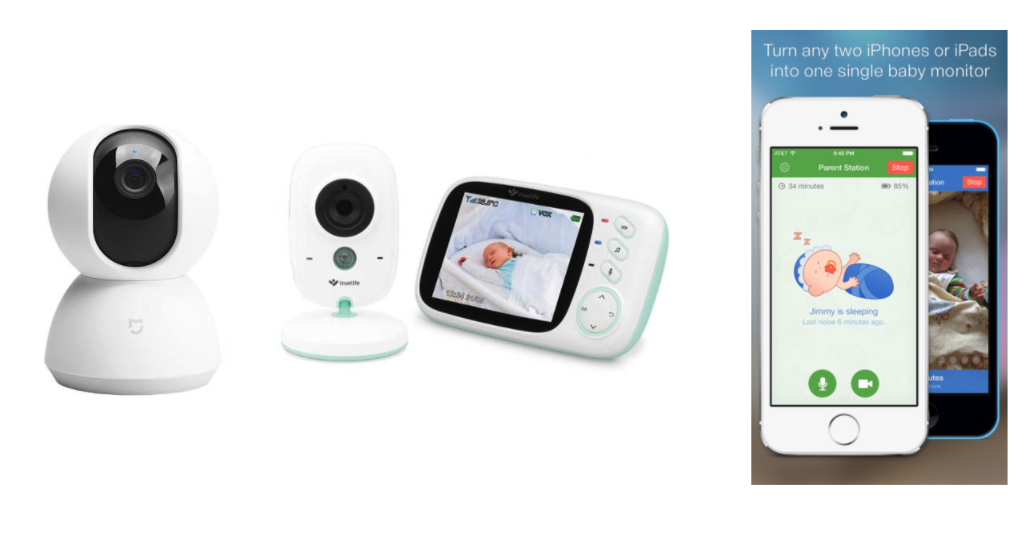
System functions
Our primary goal is not to differentiate ourselves from the competition but to create our own smart device. Based on the analysis of existing solutions, we have created a set of functionalities, that we expect from a baby camera.
System should record this parameters in real time:
-
Image
-
Sounds
-
Temperature
-
Humidity
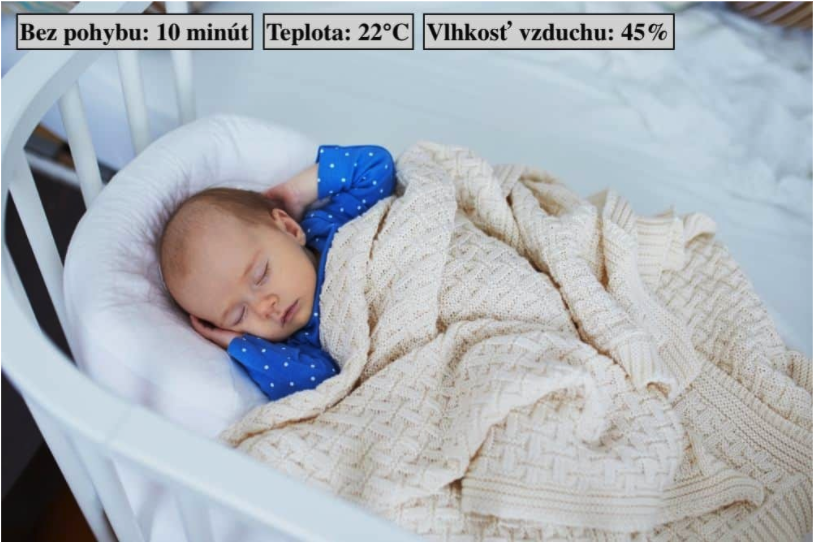
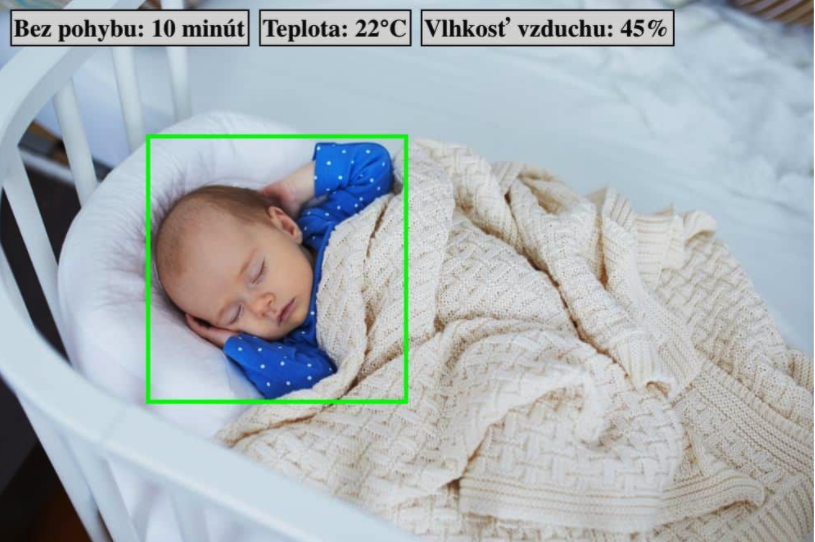
In addition, the system will detect baby movement and notifying users.
Solution description
The most important component of baby monitor is control unit which will by drive all other elements. The control unit should be sufficiently powerful and compatible but at the same time small enough. Raspberry Pi best meets these requirements. The primary goal is to create a program that will provide an interface in which the user will be able to view records from the camera and hear sound. He will also be able to talk to the child Gradually, we will expand these basic functions with smart options such as motion and temperature measuring. The user will be notified of unwanted or unusual activities.
Components
The analysis showed that we will need these components to create baby monitoring:
Raspberry Pi 4 Model B
Raspberry Pi is a small single-board computer developed in the United Kingdom by the Raspberry Pi Foundation in association with Broadcom. It is the control unit of our entire solution
Price: 71.90 €
Sensor for temperature and humidity BME280
The BME280 device is a digital barometric pressure sensor and is a slightly upgraded version of the BMP180. This is available on a small module which provides access to the sensor via the I2C interface. This allows us to easily connect it to the Raspberry Pi and read the data using Python. The BME280 provides temperature, pressure and humidity.
Price 6.20 €
Camera Microsoft LifeCam VX 1000 (we had it at home)
This camera also has a built-in microphone so it can captures both image and sound. It is connected with raspberry pi via USB.
Price: In amazon you can buy it for 37.75 €.
SanDisk microSDHC 32 GB
microSD card for operation system and Python script
Price: 8.39 €
Total price for all components are 86.49 € (without price of camera).
Proposal
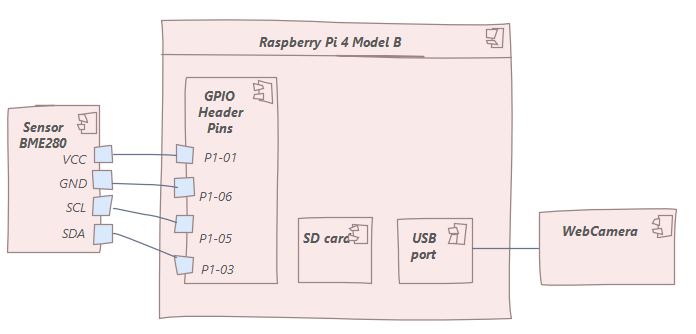
When we make component analysis, we created a diagram of the hardware, on which we placed only the elements that we will need. We also created a sensor connection to specific pins there.
A camera (that will capture the baby) can be positioned in two ways as needed. Directly on the cover of the device or mount on the bed.
Implementation
The implementation is divided into four units. The first part is image, sound, humidity and temperature recording. The second part is streaming records using a server in the local wifi network. The third part is motion detection using machine learning methods. The last part is the notification of the user in case of exceeding the set threshold values
Record
The device records image and sound using an external webcam, example. Recording temperature and humidity using the BME280 sensor is easy to implement in python.
Streaming
Streaming of image, sound, temperature and humidity using a server in a local wifi network brings privacy and security benefits. Only devices connected to the wifi network can view the recordings. No need to use third party servers. The advantage is also viewing on several devices at the same time. An example of an implementation of a server capable of streaming video can be found in the example.
Movement detection:
Machine learning methods can be used to baby motion detection. A large number of articles dealing with the detection of the human figure are available on the Internet. Pre-trained models and python integration code that identify people are freely available for download example. Using such a model, we can identify the child on the screen.
Motion detection is determined by drawing a new frame. If the frame is redrawn, we detect motion. It is assumed that the sleeping child does not move consistently for a certain period of time. Consistent movement during X minutes indicates awakening.
Notification:
User notification can take place in three ways:
3D modeling
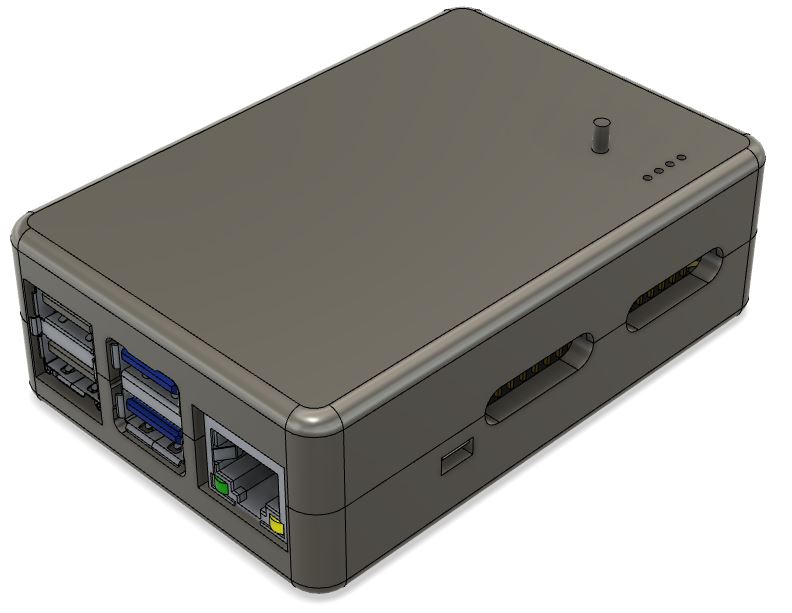
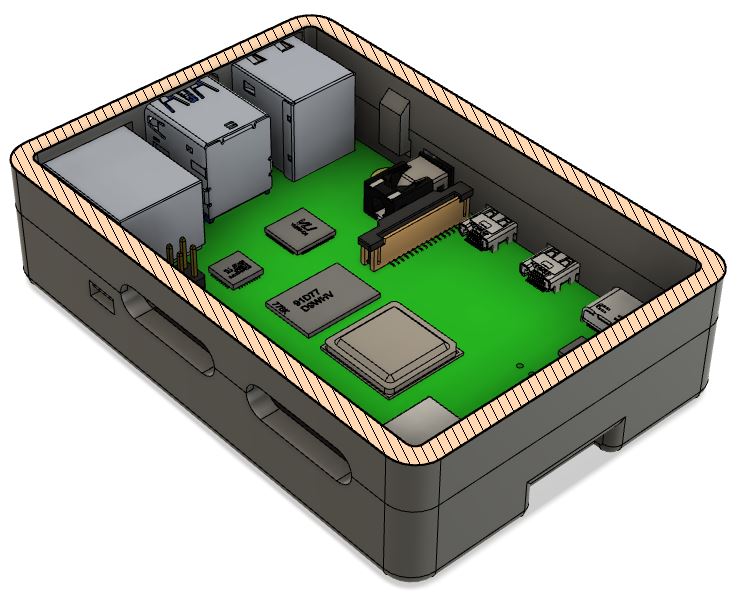
For 3D model our case of Raspberry Pi 4 we used program Autodesk Fusion 360. First we download cad model of Raspberry Pi 4 and we create case around it.
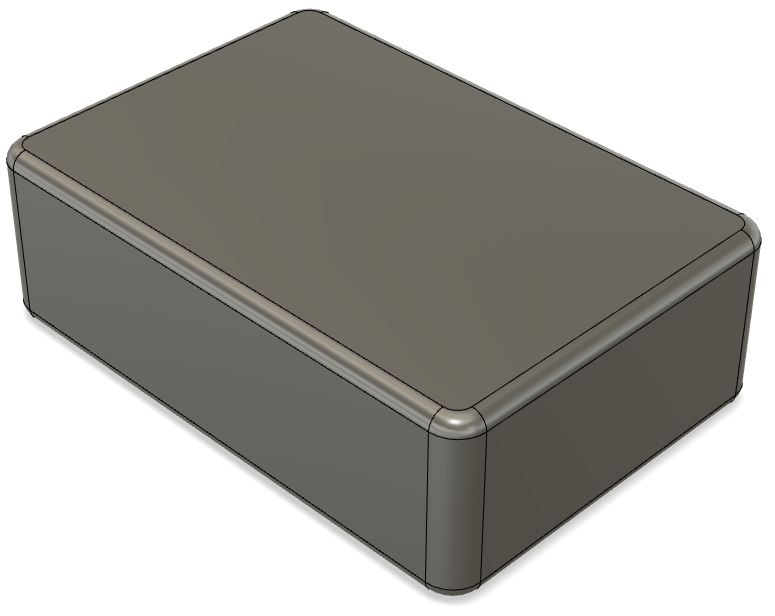
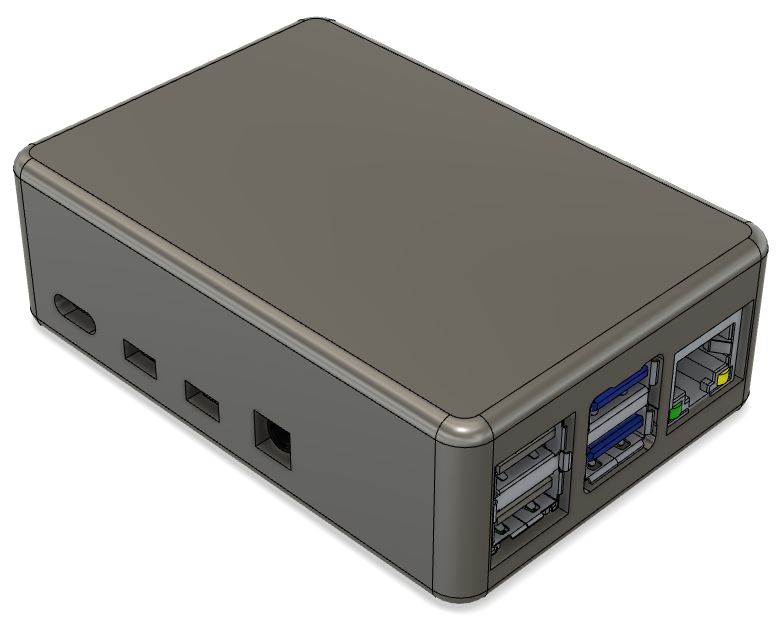
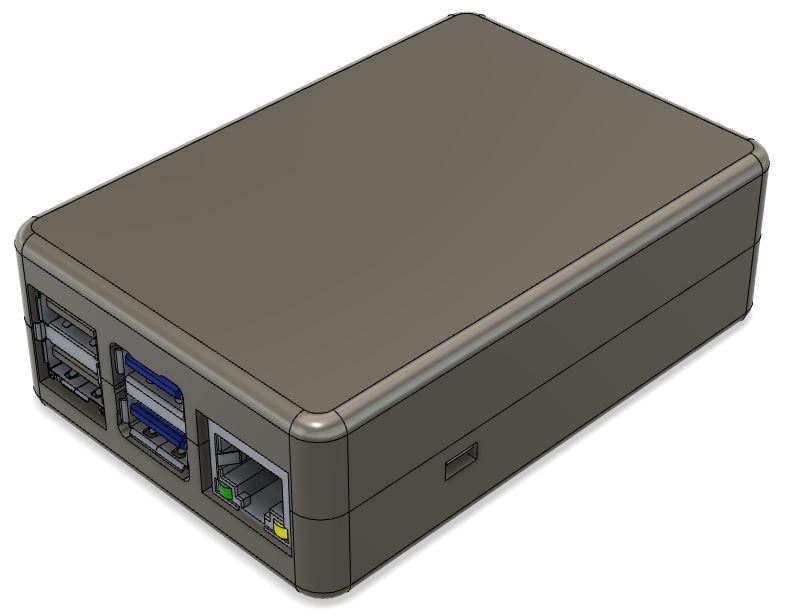
We need to cut holes for all inputs to Raspberry Pi (USB-C, USB, HDMI, micro HDMI, SD card...). At the bottom we created four pins for ensuring Raspberry Pi 4 against movement.
We split the case in half, to bottom and top part and also we created snap joints to hold the top and bottom parts together.
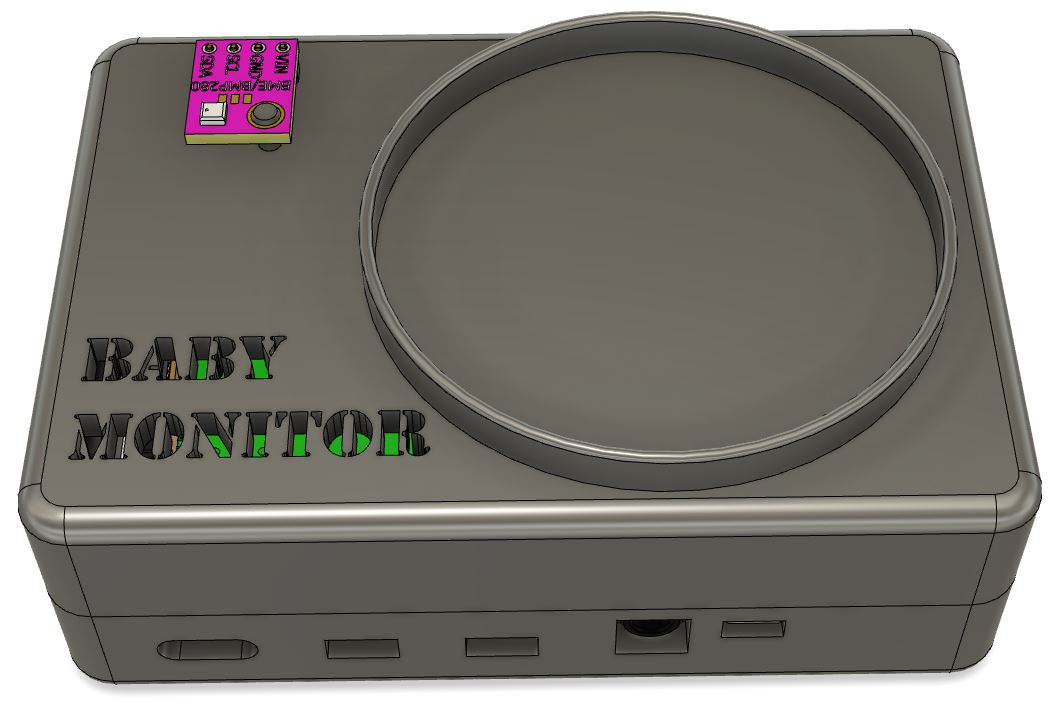
We realized that we also need holes for connecting the sensor (its cables) to GPIO pins header and also that I need to somehow connect the sensor to the raspberry pi. We did not want to put it inside the package so that the temperature was measured correctly.
Since raspberri pi can overheat, we have created the inscription "Baby Monitor", which can also be used to ventilate hot air. Lastly we created a camera holder (only for our camera type – Microsoft lifecam vx 1000 what we found at home).
View into our case of Raspberry Pi 4:
You can find our entire model as well as the model without a camera holder at the following links:
Links
 2023/2024