Quad Finder
Team members:
- Bc. Matej Kubena
- Bc. Miroslav Pavlák
Introduction to FPV
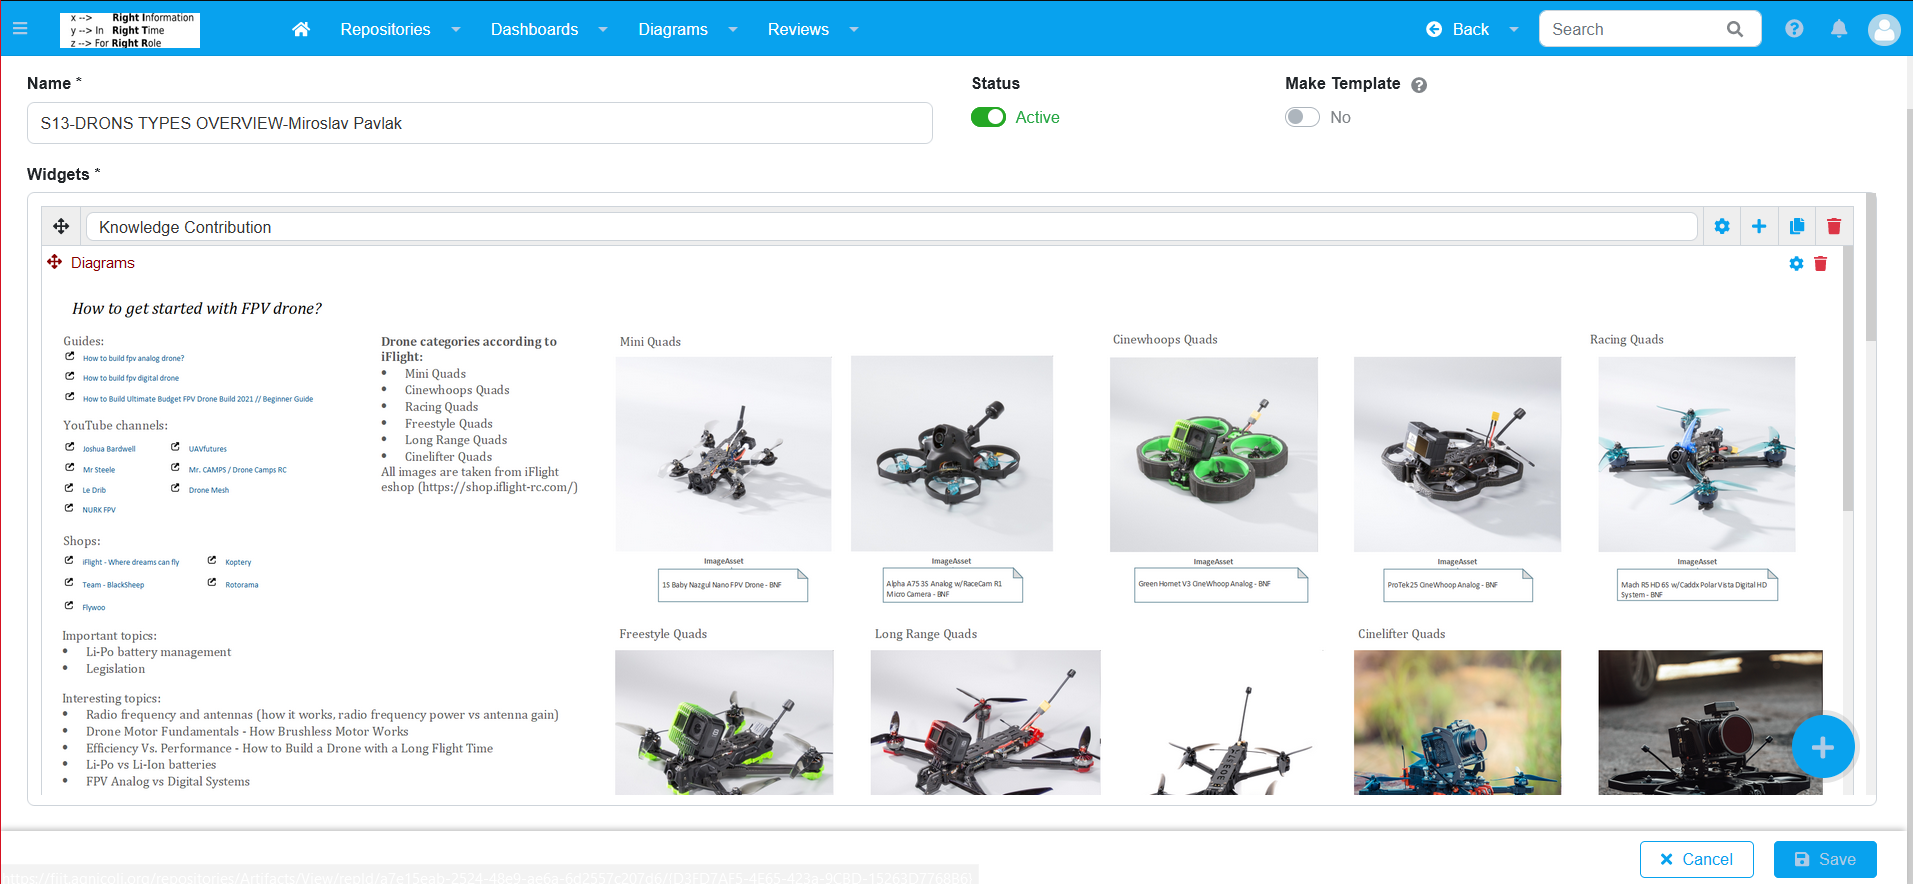
Issue
While flying an FPV (First person view) drone one can find themselves in an unfortunate circumstance that requires either an emergency landing to be performed or that can result in a crash. Such circumstances can be classified as:
- Loss of video signal:
- Cross-channel interference
- Signal attenuation caused by the environment
- Loss of Voltage:
- Short circuit of onboard electronics
FPV drones do not come with RTH (Return To Home) functionality as standard as opposed to drones made by DJI. Thus in case of signal loss in most cases is the pilot powerless and can only hope that their drone will survive upcoming crash with the least damage possible.
In the instance in which the drone crashes in a dense forest environment, it becomes difficult for the drone pilot to trace the drone to it’s crash site without any active location monitoring. The task of retrieving the drone can be made all the more difficult by the fact that during the crash of the drone, the main battery can become disconnected thus effectively shutting off the power for the entire drone with all of its modules.
Solution
In order to accurately communicate the drone position with the drone operator, a GPS module can be used. It can be installed directly on the drone thus actively monitoring the GPS location of the drone. Then if the location data is transmitted to the drone operator, this data can be then helpful in the subsequent search for said drone with the knowledge of the last known position of the drone. Such GPS module can be also used to create an RTH functionality for the drone.
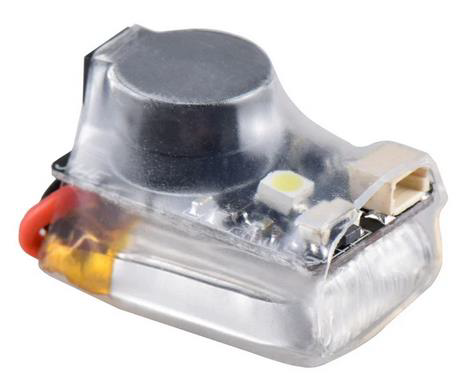
Another module that the drone will be equipped by is the buzzer module powered from the main battery. Although in the event in which a crash occurs and the main battery is disconnected, the buzzer will become useless. Thus an appropriate proposition is to power the buzzer with an external battery independent of the main battery of the drone.
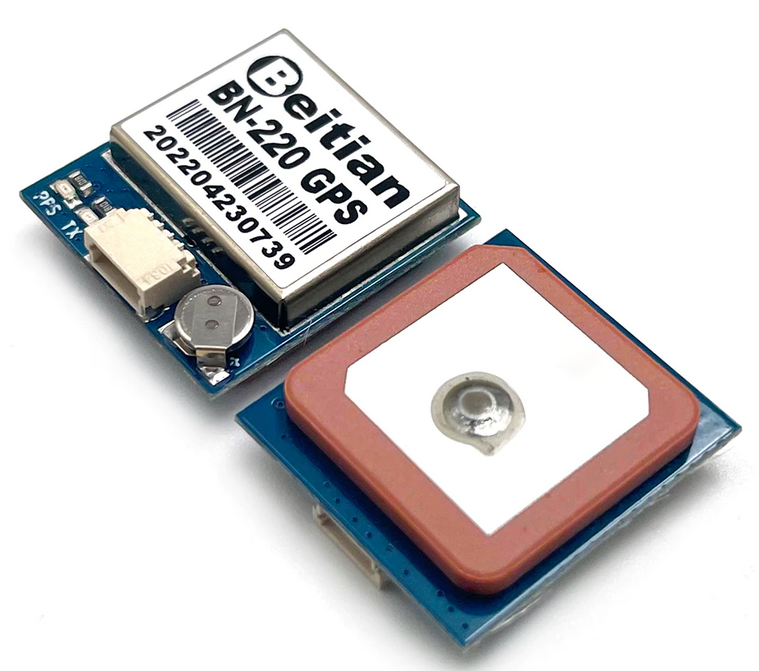
Needed parts
For the implementaion of the proposed idea will be needed:
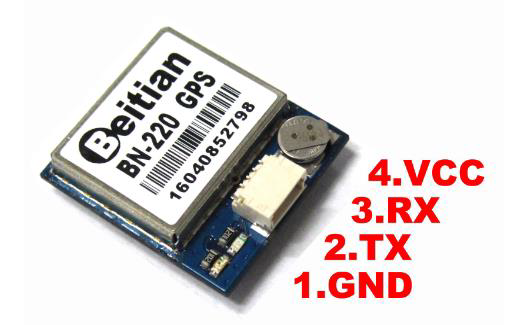
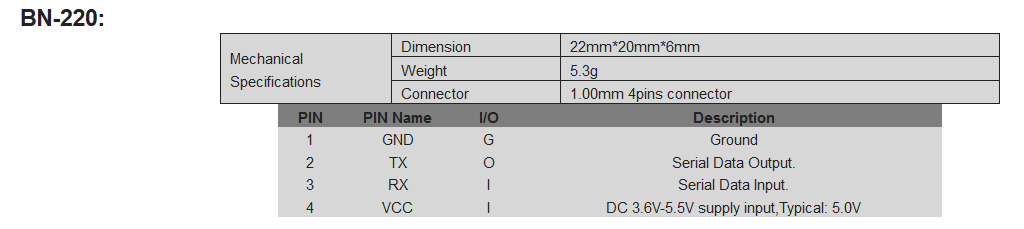
- GPS module - Beitian Dual BN-220 GPS
- Buzzer module - Finder JHE42B-S 110DBI Buzzer
- 3D printed mount for the listed modules
Proposal
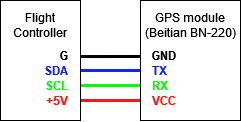
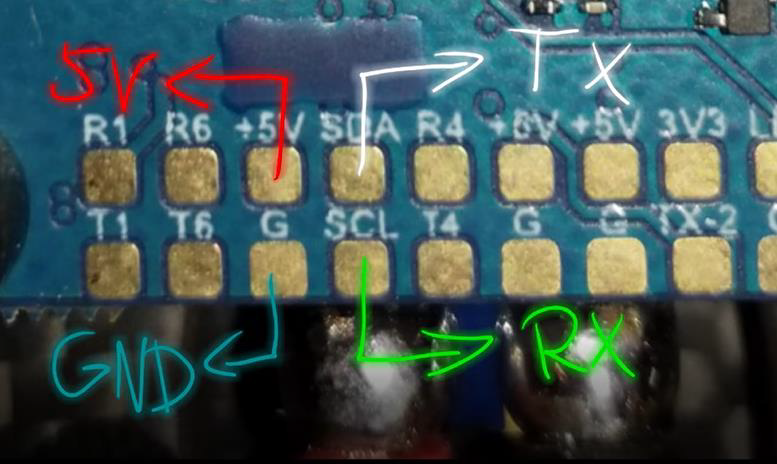
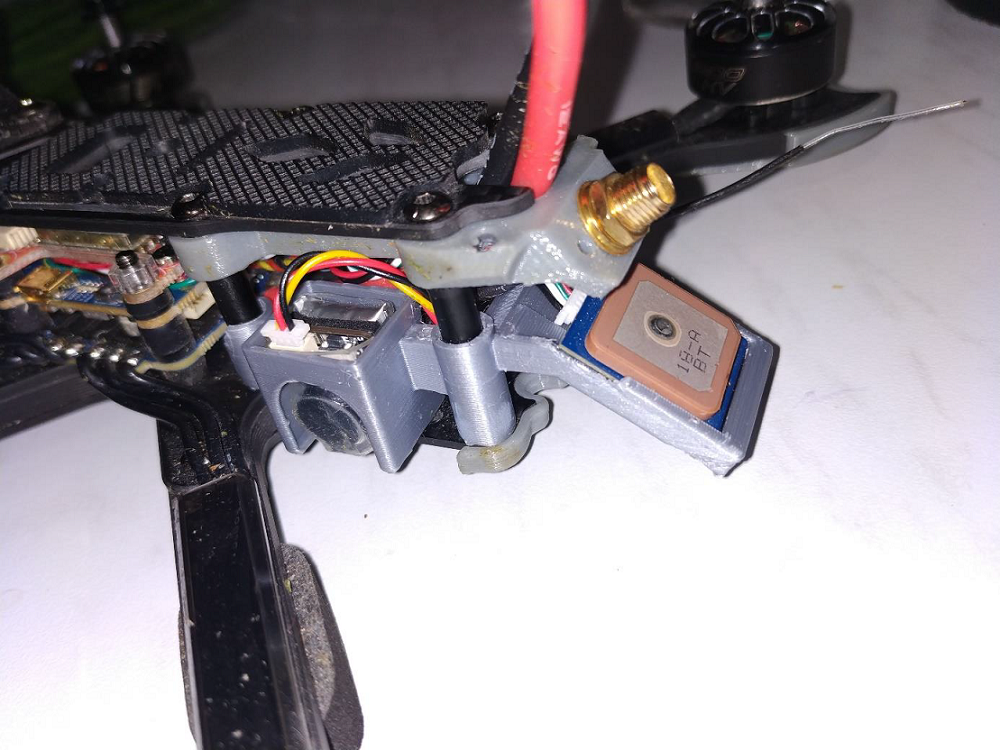
GPS and the buzzer module with the external battery will be soldered to corresponding pins of the control unit of the FPV drone. Subsequently these modules will be installed onto the mount and attached to the frame of the drone.
Wiring diagram featuring the GPS module and the control unit
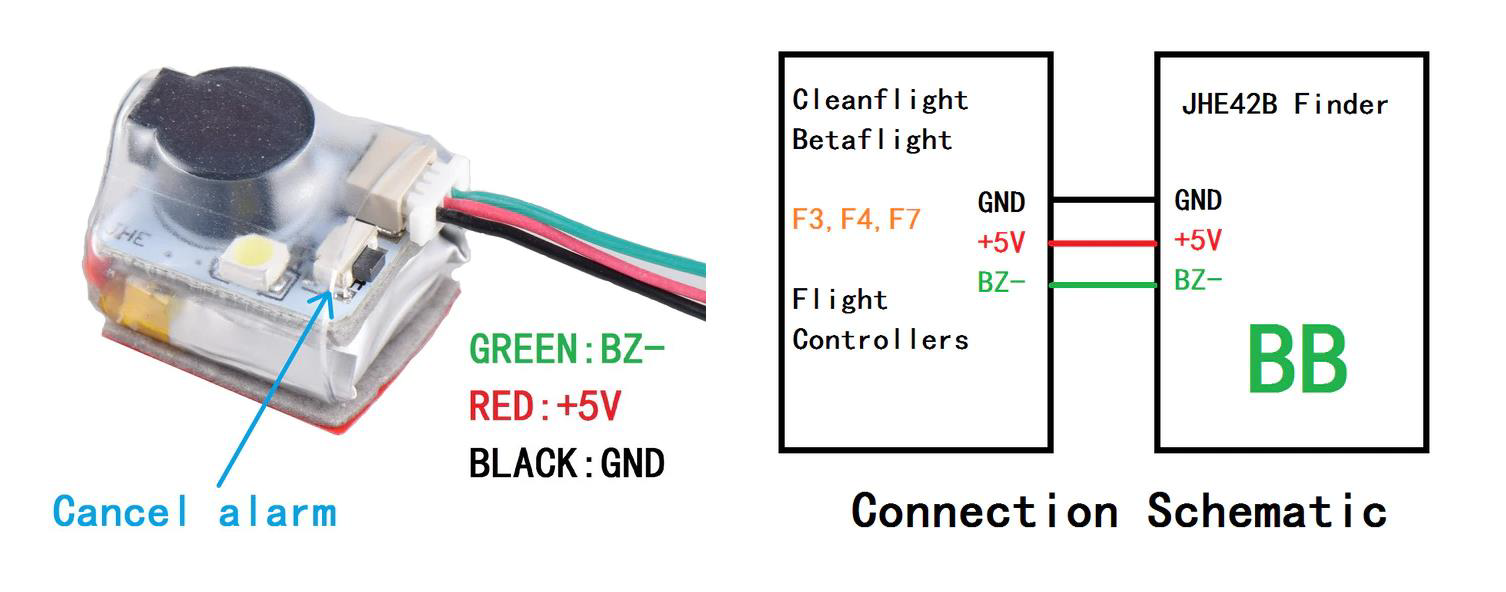
Wiring diagram featuring the buzzer module and the control unit

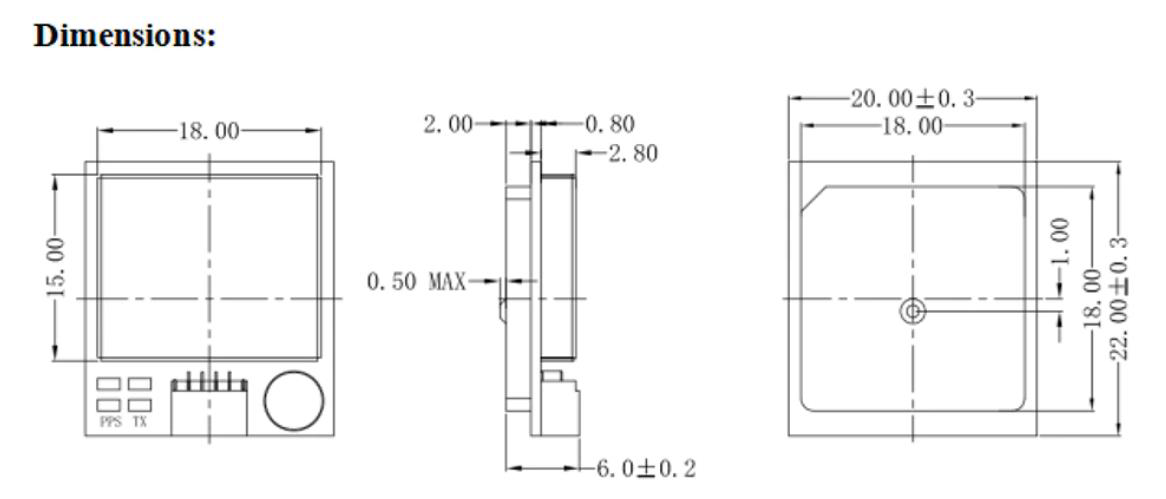
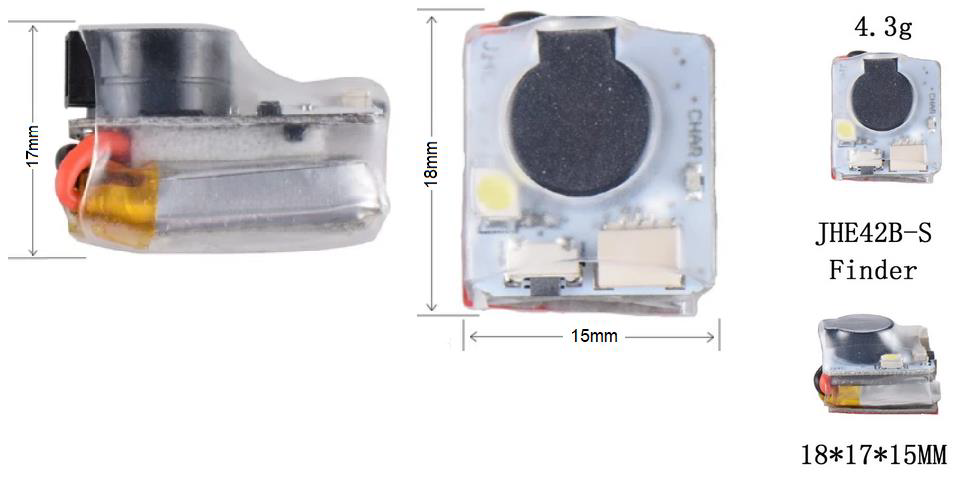
GPS and Buzzer Module Dimensions
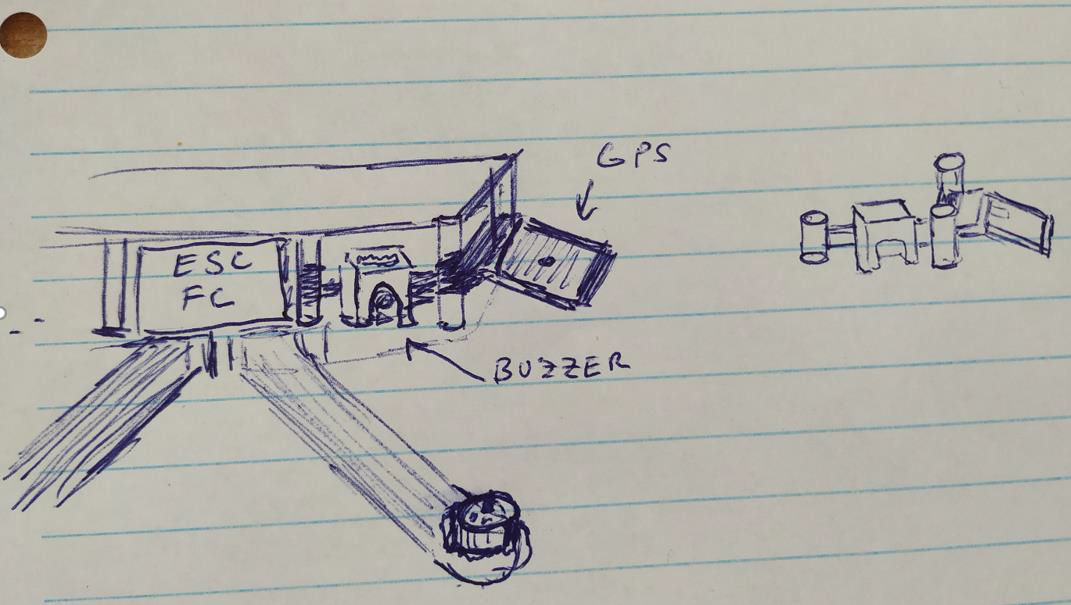
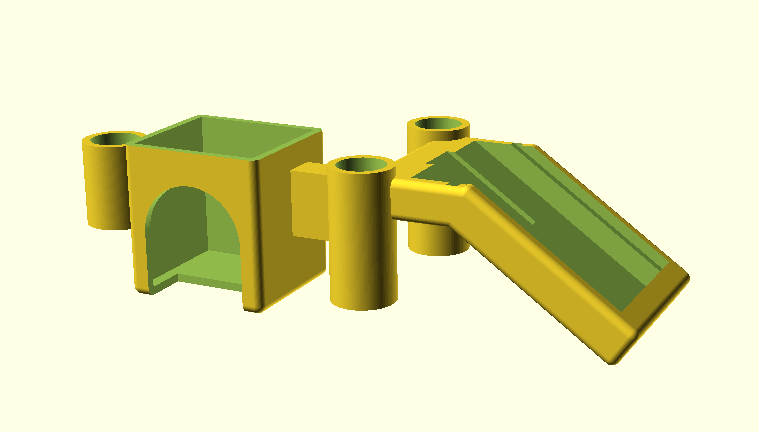
Design of the Mount for the GPS and Buzzer Module
GPS Rescue Configuration
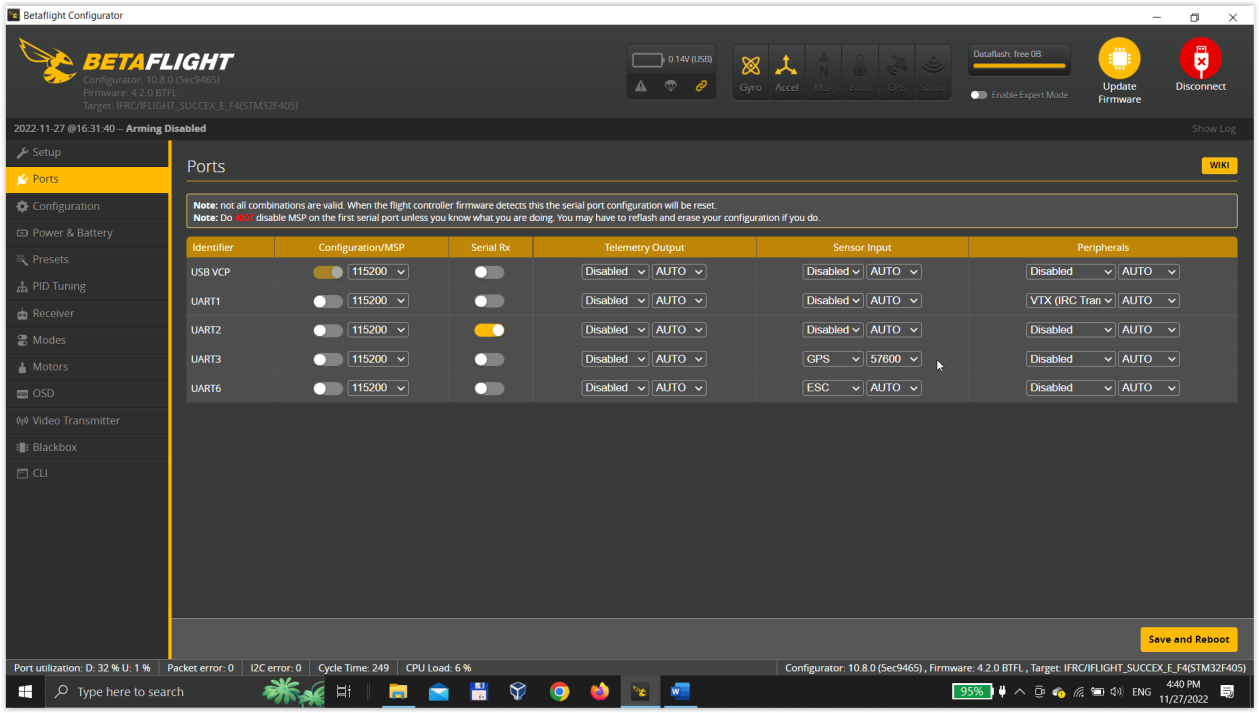
In the Sensor Input section under the Ports tab we will select the port UART3 (Universal Asynchronous Receiver-Transmitter is a computer hardware device for asynchronous serial communication) for the GPS module. Next we will set the bitrate at 57600bps. At last we select the Save and Reboot button.
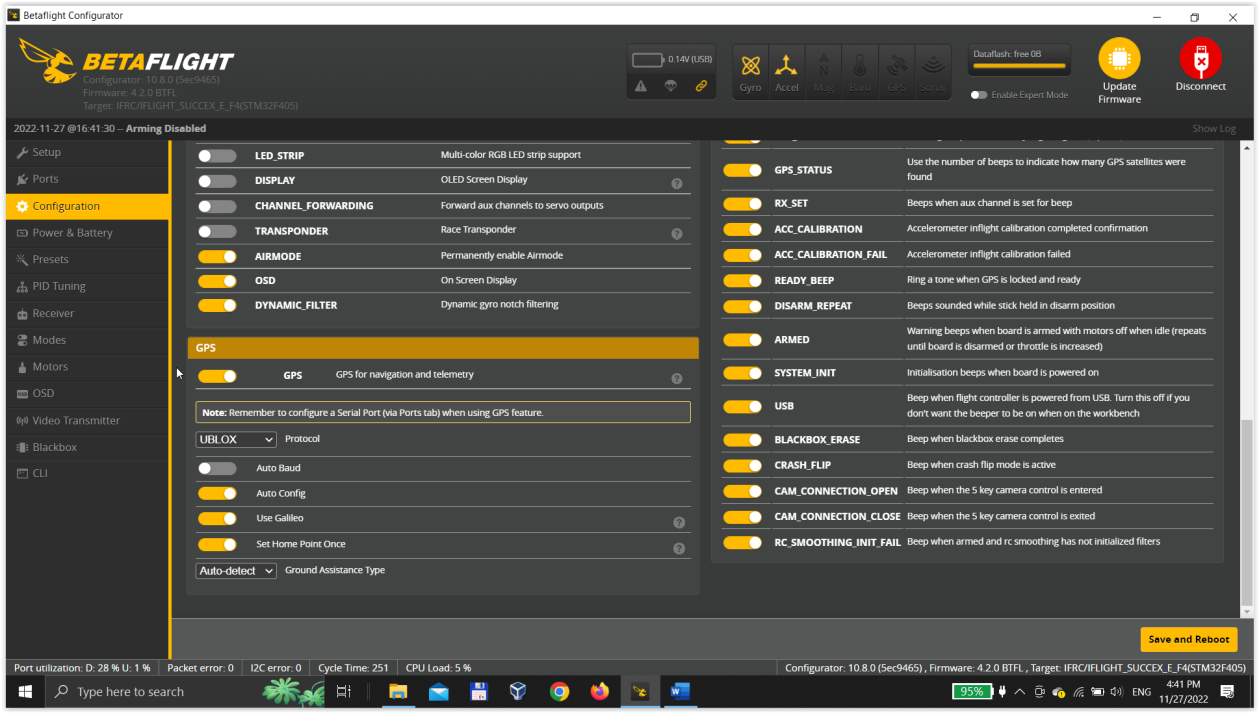
In the Configuration tab we check the GPS field. As Protocol we choose Ublox and keep the rest default. Then select Save and Reboot.
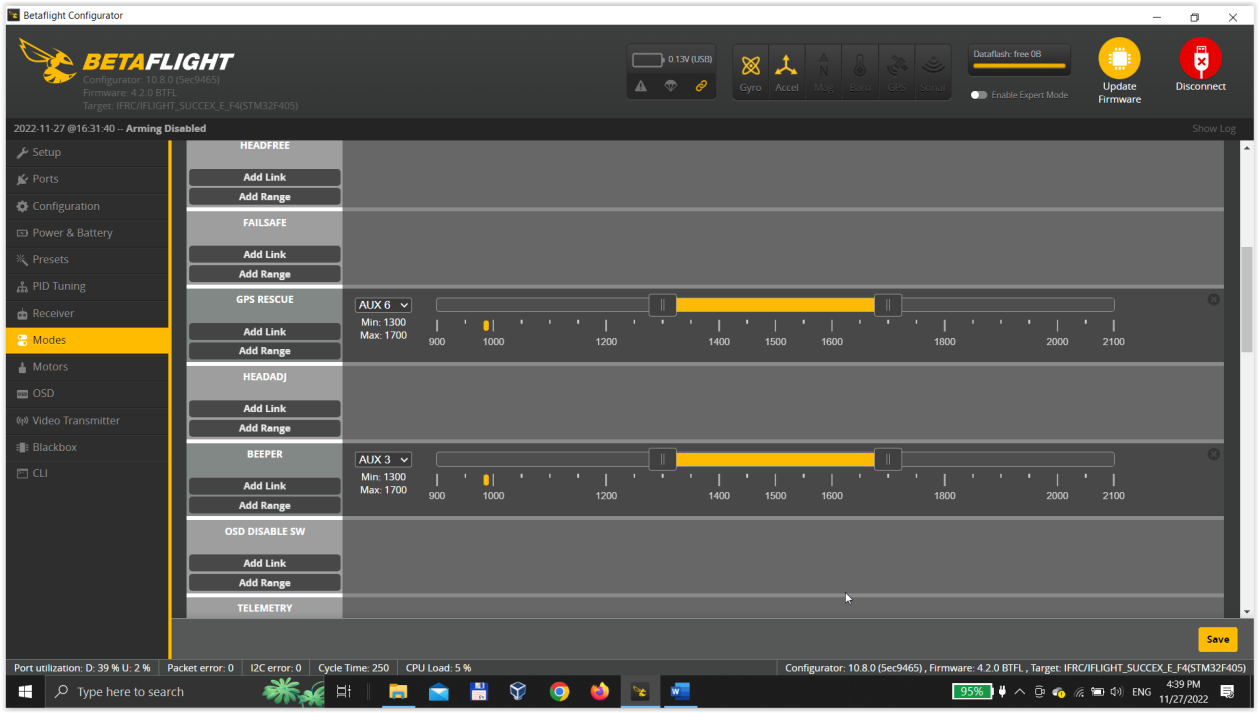
In the GPS RESCUE section of the Modes tab, we chose the channel number according to the switch on the controller we chose earlier, in our case it is AUX 6. Then select Save.
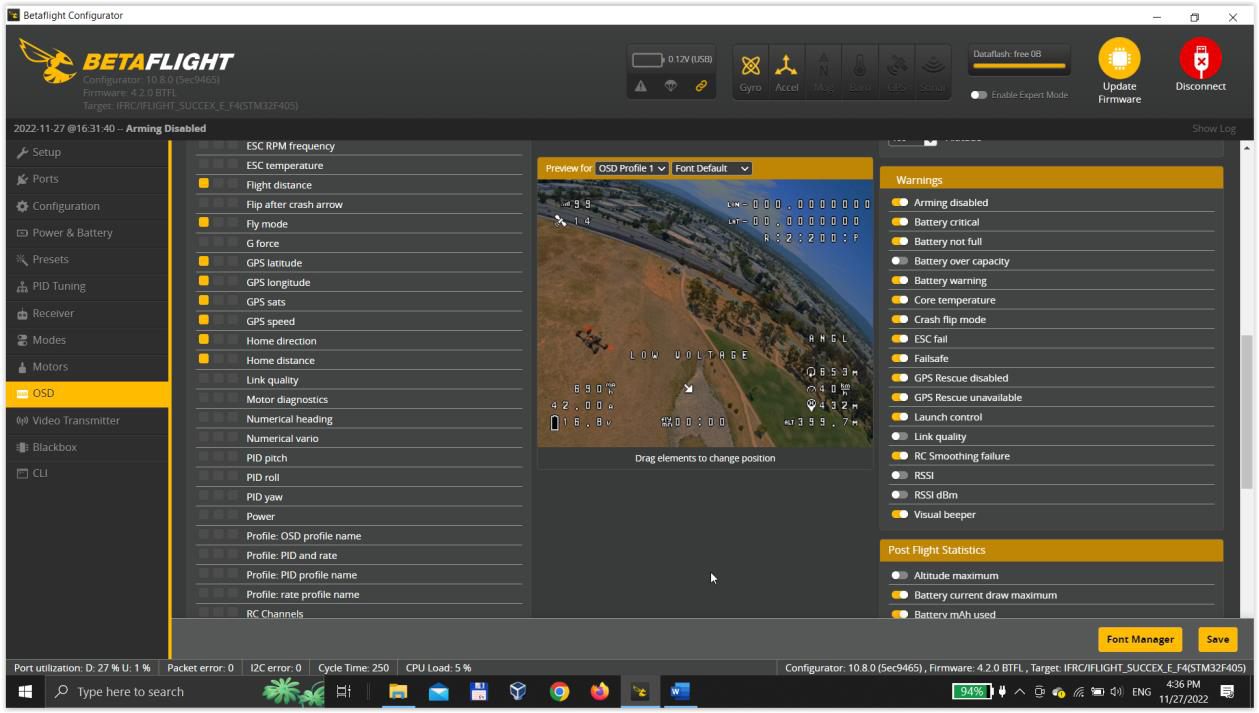
In the OSD (On-Screen Display) tab we will add all of the elements listed below and position them according to ones prefferences. Then select Save.
- Flight distance
- GPS latitude
- GPS longtitude
- GPS sats
- GPS speed
- Home direction
- Home distance
Testing
In this section we will verify functionality our solution in real life, which is divided into multiple scenarios.
Senario 1: During this scenario, we will simulate a crash where the drone's main battery is disconnected. In principle, we just disconnect the drone from the main battery and wait for the buzzer to respond.
Result: After disconnecting the main battery, the buzzer started beeping within 40 seconds until it was manually turned off. Proof of concept is shown in this video.
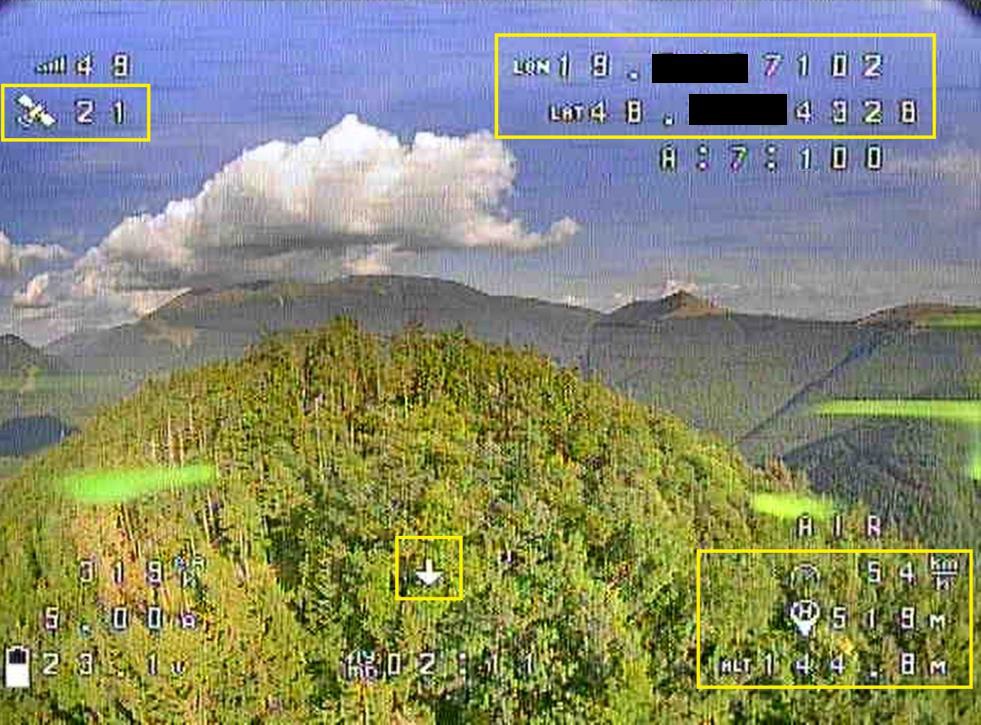
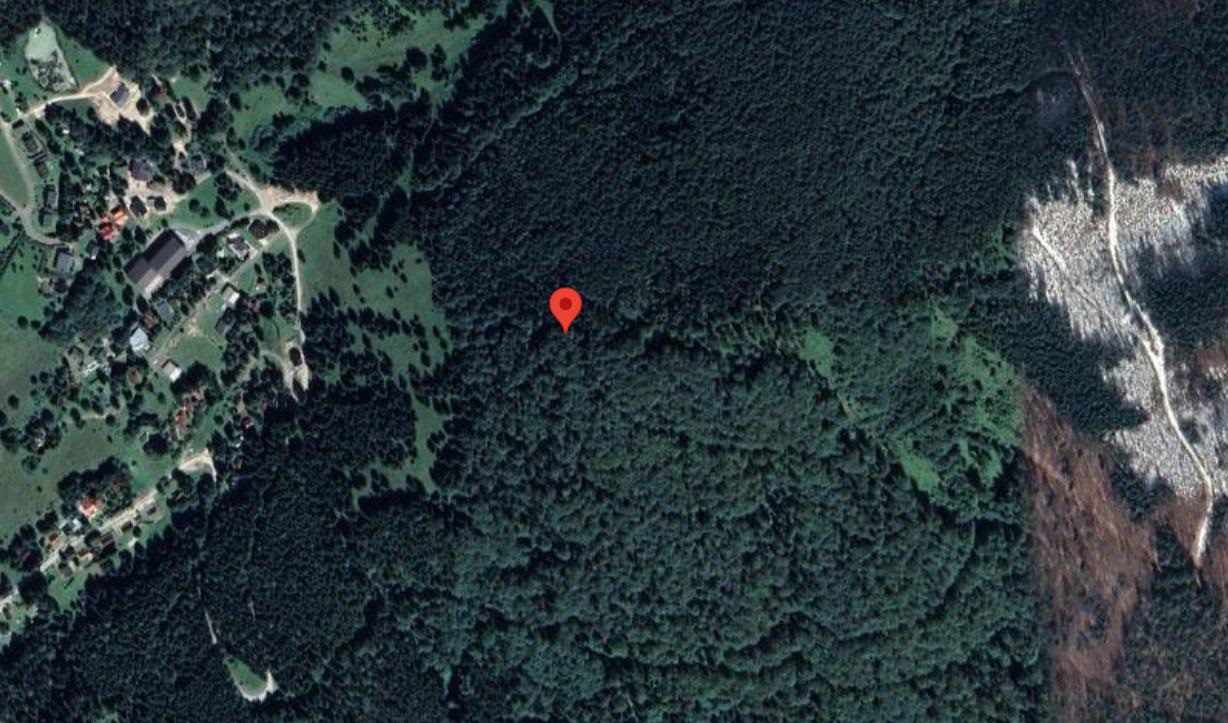
Senario 2: In this scenario, we will test the functionality of the GPS module attached to the drone, whether the information provided by this module is shown on the display of the FPV goggles and whether the information about the current position is right. In principle, we take off at a pre-arranged location and note down information about the current location. Then we will verify them via the Google Maps web app.
Result: In the following figure you can see that the display of the FPV goggles shows all the information that we have configured using the BetaFlight program. In the next figure you can see a map with the current position of the drone, which corresponds to the real position of the drone at the time the picture was taken.
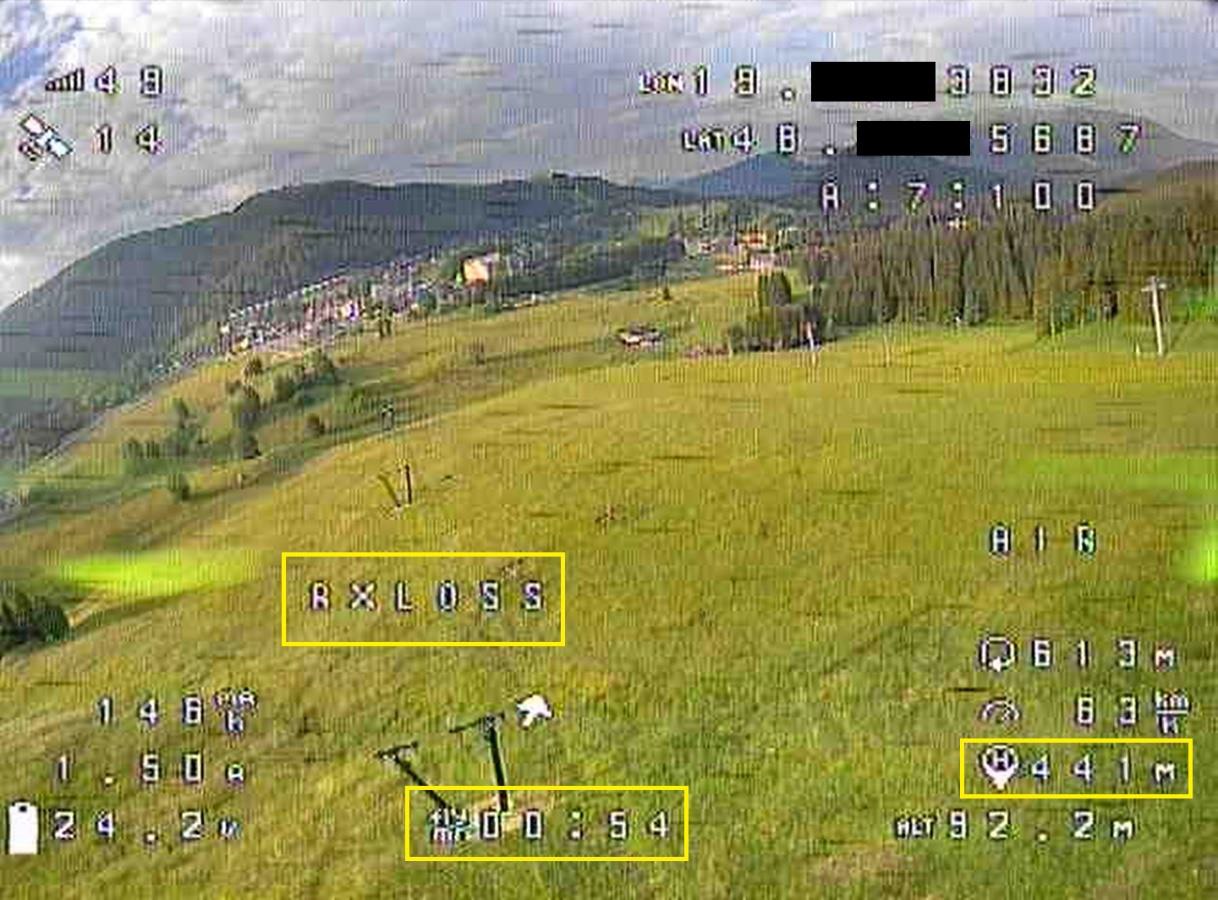
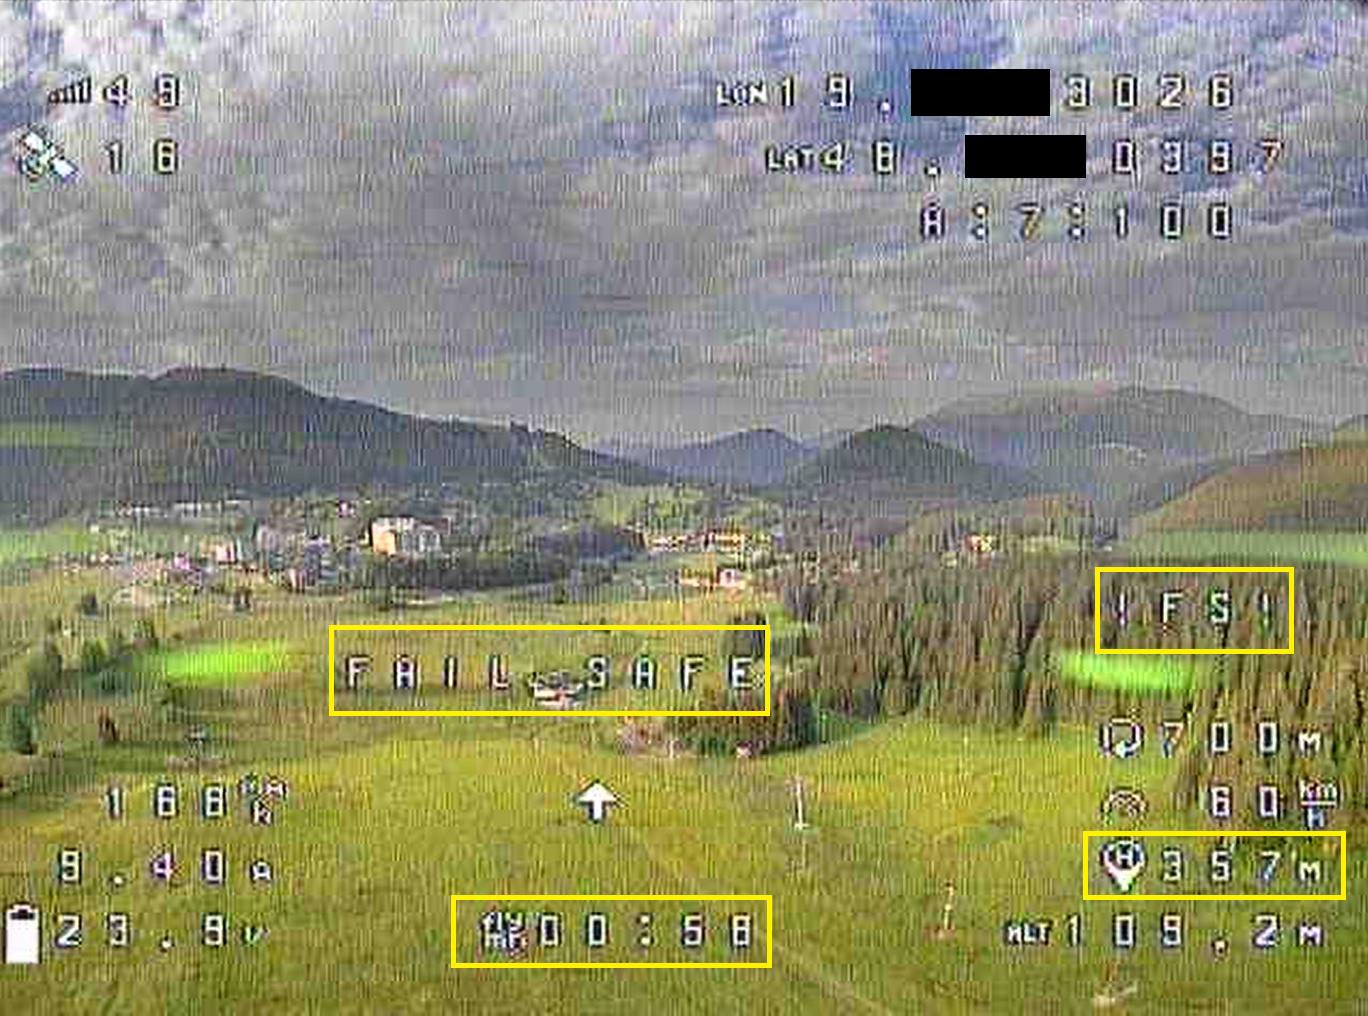
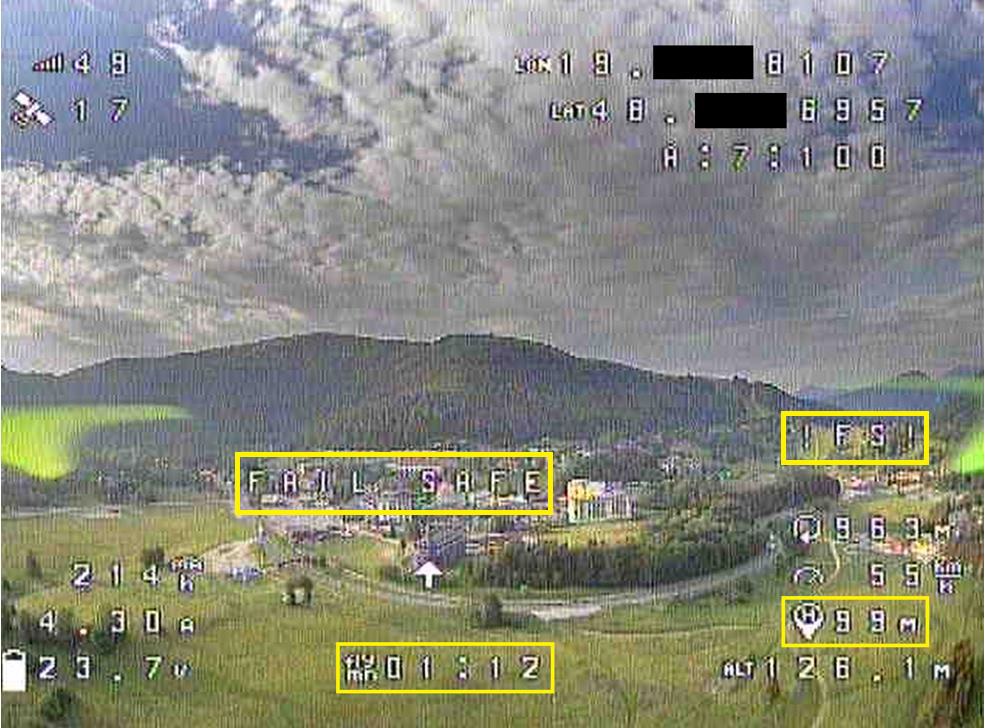
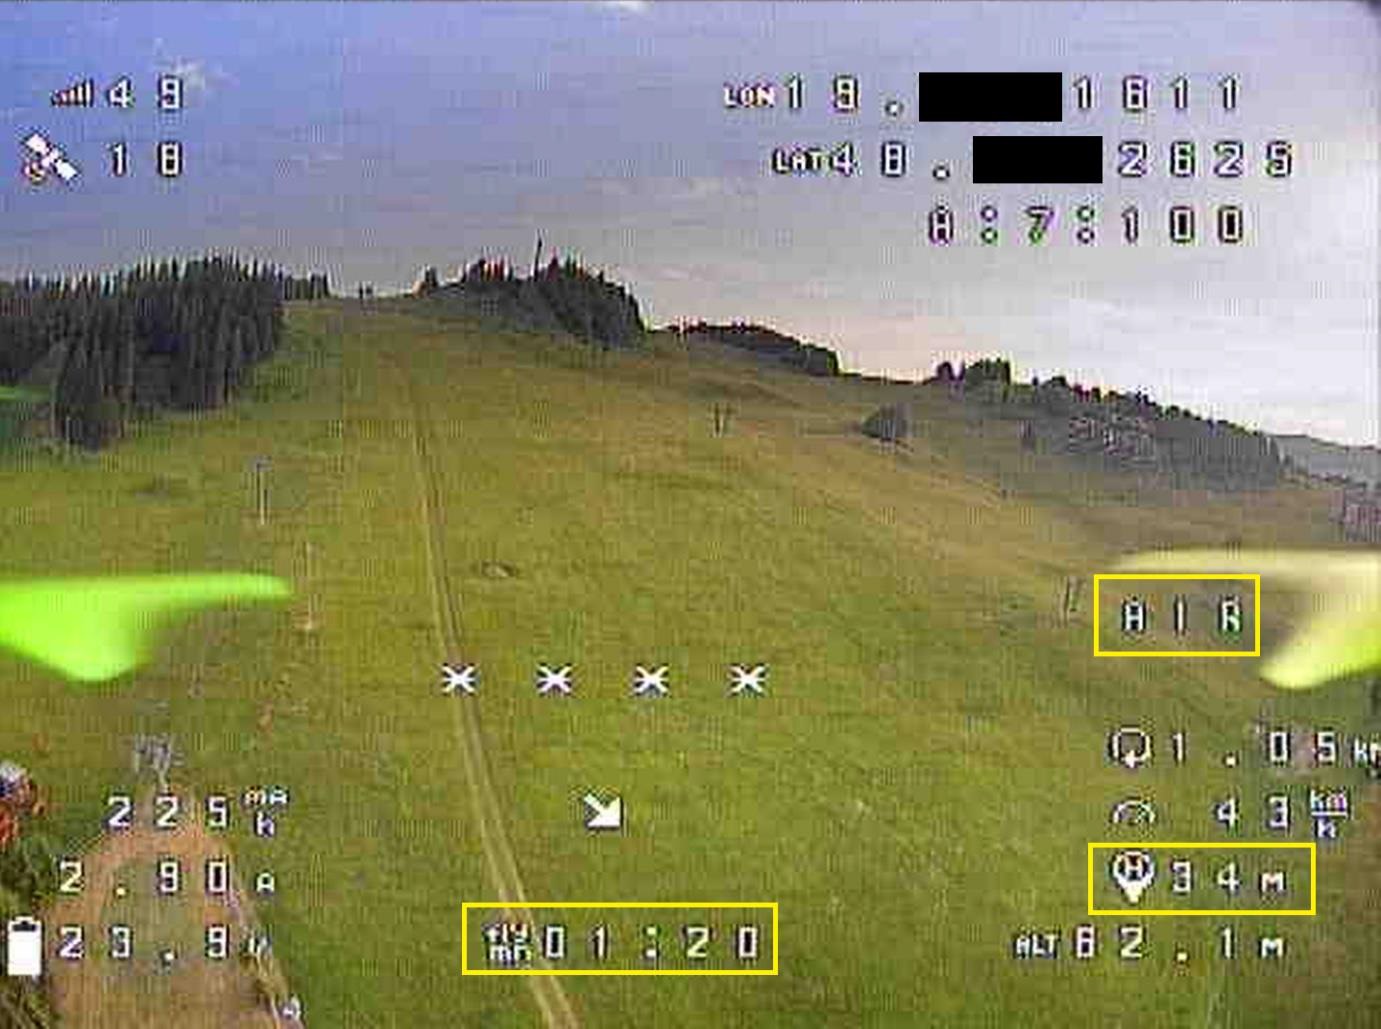
Scenario 3: In this scenario we will verify the functionality of the GPS Rescue functionality that we have configured on the drone, the functionality can be tested by flying far enough to cause signal loss or by using a switch that will trigger the GPS Rescue functionality.
Result: When the drone was 441 meters away from the initial take-off position, the signal was lost. Subsequently, the GPS Rescue functionality was activated and the drone switched to FAIL SAFE mode, when the drone took off to the default altitude and aically began to return to the original take-off position. When the drone was at a distance of less than 50 meters from the initial take-off position, the FAIL SAFE mode was turned off and the pilot took full control of the drone. The sequence of these steps is illustrated in the following figures or in the video.
References
[1] BetianOfficial Store, „Aliexpress,“ Betian, [Online]. Available: https://www.aliexpress.com/store/2837118. [Cit. 6 November 2022].
[2] Goodluck338 Store, „Aliexpress,“ Goodluck338 Store, [Online]. Available: https://www.aliexpress.com/item/32919224534.html. [Cit. 6 November 2022].
[3] Beitian, „Banggood,“ Beitian, [Online]. Available: https://files.banggood.com/2016/11/BN-220%20GPS+Antenna%20datasheet.pdf. [Cit. 6 November 2022].
[4] blueRC, „iFlight Nazgul5 - GPS Modul Einbauen und in Betaflight einrichten - Tutorial mit Testflug,“ Youtube, [Online]. Available:
 2023/2024